Digital Mavica Camera
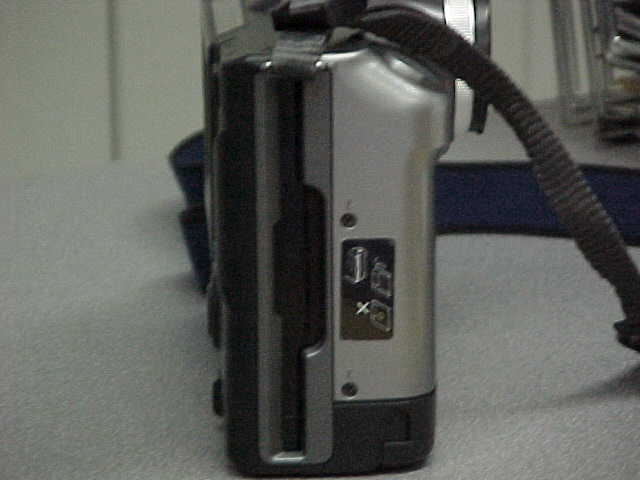
- Insert the disk into the side of the camera until it clicks.
- To remove the disk, slide the EJECT lock down, slide DISK EJECT in the direction of the arrow.
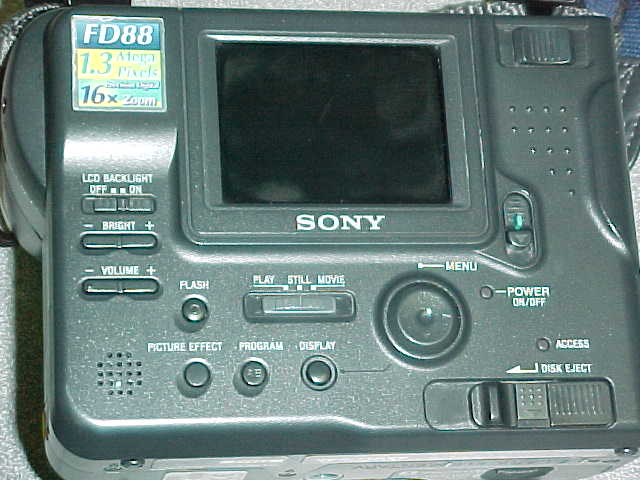
Volume +/- button Speaker Zoom Lever Control Button On/Off Switch
LCD Screen Play/Still/Movie Button Disk Eject
Function of the Control Button:
- By pressing the upper, lower, left or right arrows on the control button you can execute the functions of the camera.
- When an item is selected in the menu, the color of the item changes from blue to yellow.
- To enter your selection, press the center of the control button.
- To record the images, slide the POWER switch down to turn on the power and insert the floppy disk until it clicks.
- The camera is set to Auto-focus. Use the wide/telephoto (Zoom) button to adjust the area selected.
- Set the Play/Still/Movie Button on Still.
- Press the shutter button halfway down.
- Press the shutter button fully down.
- Hold the camera still while recording the picture.
Recording Still Images:
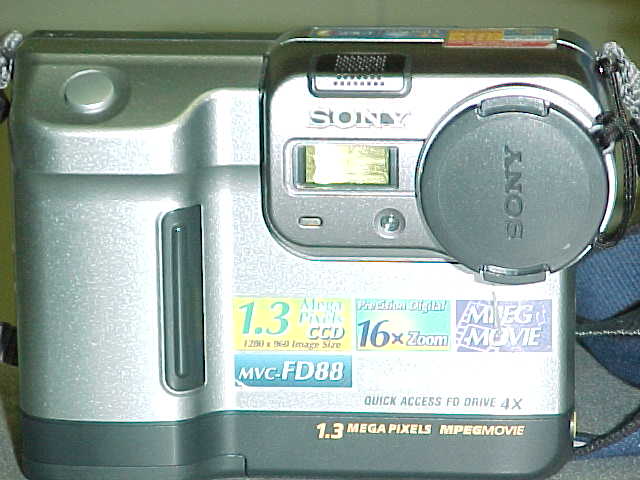
Don’t forget to remove the lens cap!!!
Recording Moving Images:
Playing Back Still Images:
- Set Play/Still/Movie to Play.
- Press the up arrow on the control button. The menu bar appears on the LCD screen.
- Select the recorded image with the control button.
Viewing Images Using a Personal Computer:
- Turn on the computer and insert the floppy disk into the A drive of the computer.
- Open a word processing document like Microsoft Word. Click on Insert from the main menu.
- Point to Picture to display the popup menu.
- Select From File to display the File Manager dialogue box.
- Select the A Drive.
- Select the desired picture to insert.
- Select Insert to insert the picture selected.
Deleting Images:
You can delete all or selected images that you no longer want to keep.
- Set Play/Still/Movie to Play.
- Press the up arrow of the control button. (The menu bar appears on the LCD screen)
- Select Delete with the control button, and then press the center of the control button to choose your selection.
- Select ON with the control button, and then press the center of the control button to choose your selection. (The displayed image is deleted)
In Index Mode:
- Display the Index screen.
- Select Delete with the control button, and then press the center of the control button.
- Select All to delete all images or Select to delete selected images with the control button.
Formatting a Floppy Disk:
- Press the up arrow on the control button. (The menu bar appears on the LCD screen.
- Select File with the control button, and then press the center of the control button to choose your selection. (The File menu appears)
- Select Format in the Disk Tool with the control button, and then press the center of the control button to choose your selection.
- Select OK with the control button, and then press the center of the control button to choose your selection.
To Cancel Formatting:
Select Cancel with the control button in step 4, and then press the center of the control button.
Care of the Camera:
- Cleaning the LCD screen: Wipe the surface with a LCD cleaning kit (not supplied) to remove fingerprints, dust, etc.
- Cleaning the camera surface: Clean the camera surface with a soft cloth slightly moistened with water. Do not use any type of solvent such as alcohol or benzene as it may mar the finish of the casing.
- Using the camera on a sandy beach or in a dusty place: Do not let sand get into the camera. Sand or dust may cause the unit to malfunction, and sometimes this malfunction cannot be repaired.